
Step 1
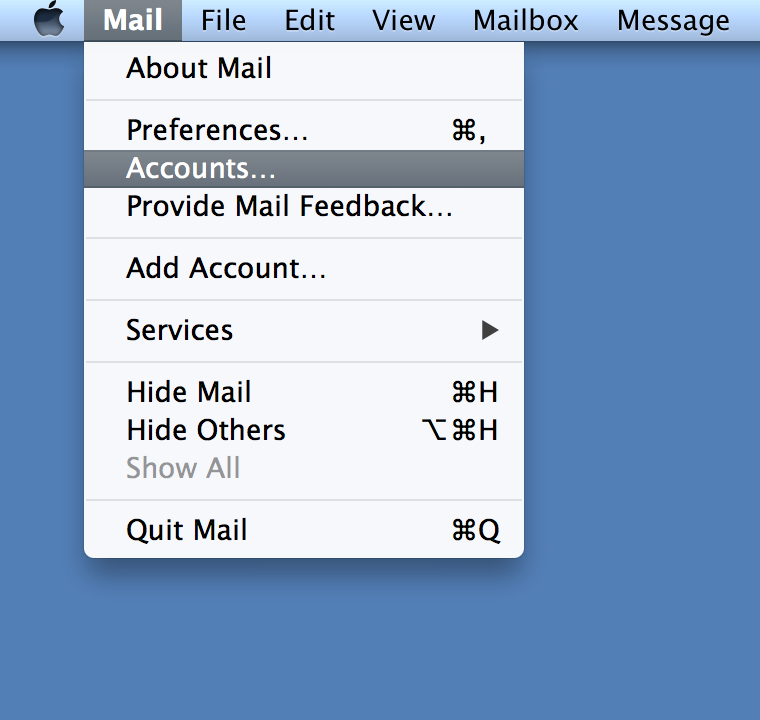
Open Apple Mail. Click on Mail -> Accounts in the toolbar on the top left of your screen. It will ask you to choose an account type. Go with the default “Add a Mail account.”
Step 2
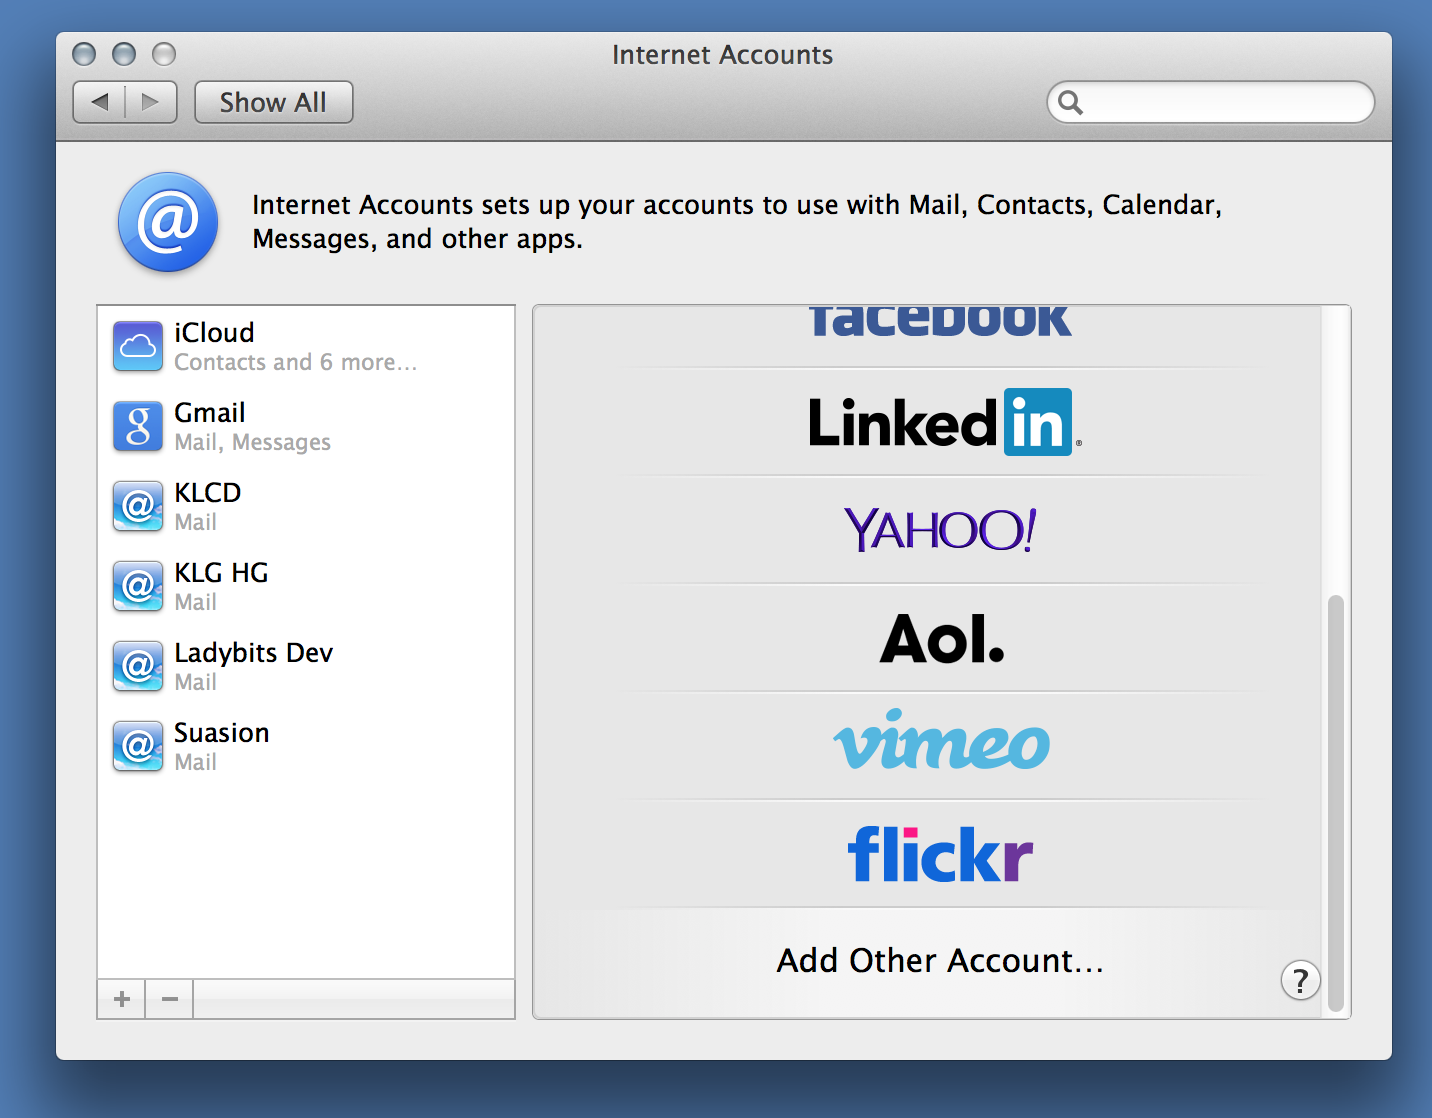
If the types of mail accounts are visible on the right, scroll to the bottom and click on Add Other Account. If the mail accounts are not visible, click on the plus sign on the bottom left of the screen. It will tell you that the account needs to be manually configured. This is normal. Click next.
Step 3
This should bring up a box similar to the one below in the image. “Full Name” is whatever you would like your outgoing display name to be when sending emails. Email address and password should be copied and pasted from the setup documenation you received. Maake sure it is copied and pasted directly as typing can be inconsistent. Your mail client (apple mail) will attempt to auto feed in this data. Check it anyway!
Step 4
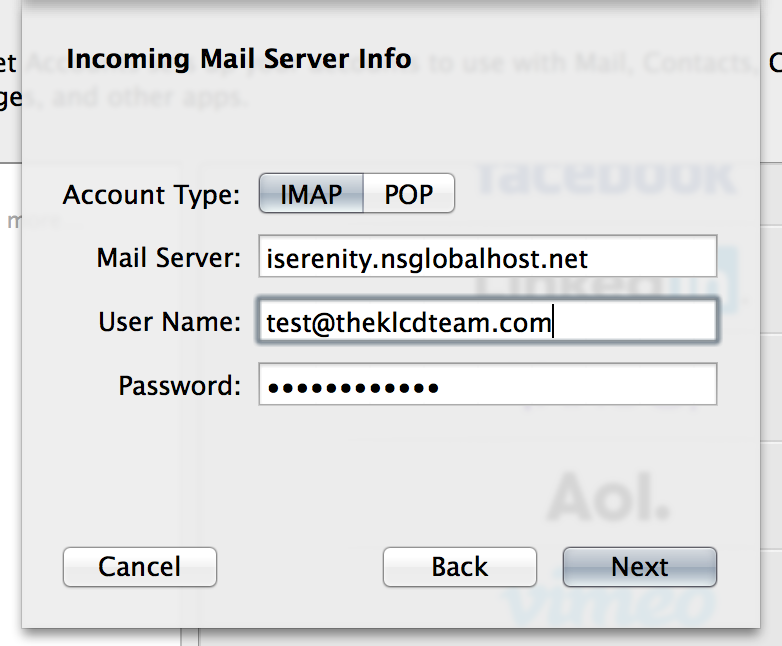
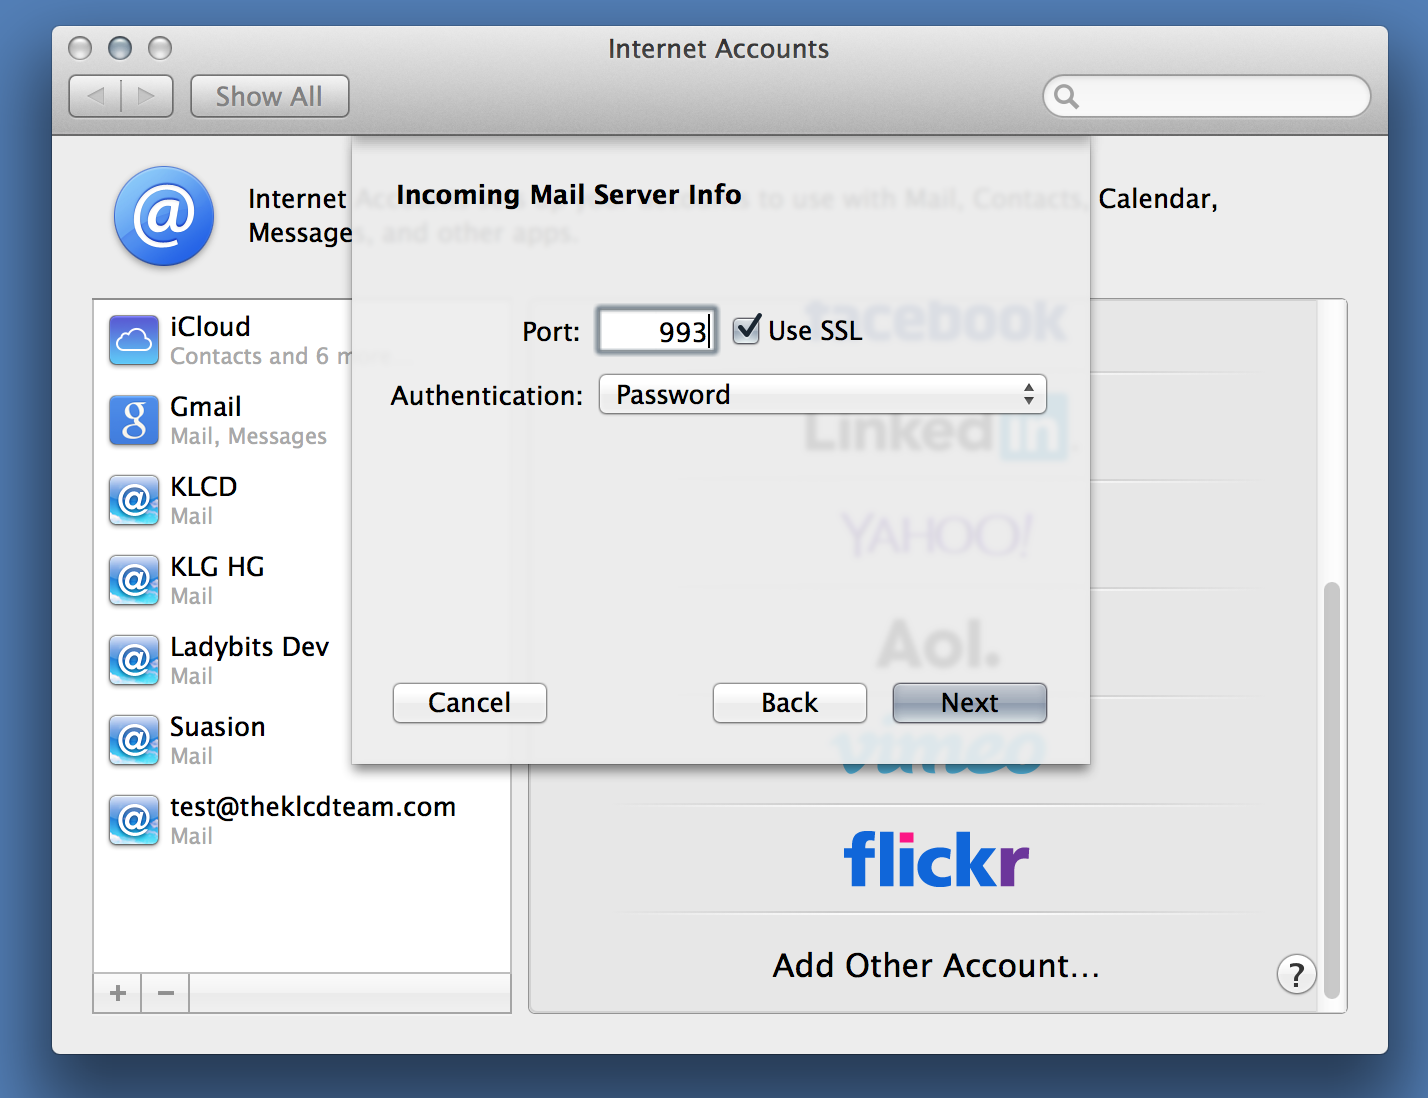
Next you will be setting up your incoming mail server information. You have the choice here between IMAP and POP and it is important to understand the difference between the two. IMAP syncs with the server. This means that if you have multiple devices connected to the same email account such as a phone and computer, and you delete an email on your phone, it will be deleted on your computer as well. POP does not sync and only downloads email. Changes you make to one device are not reflected on another device.
I generally recommend IMAP as it is easier to manage and keep those inboxes clean! Do what works best for your system. The configuration is the same whichever you choose, although you may be prompted to edit the ports with POP.

POP Email setup
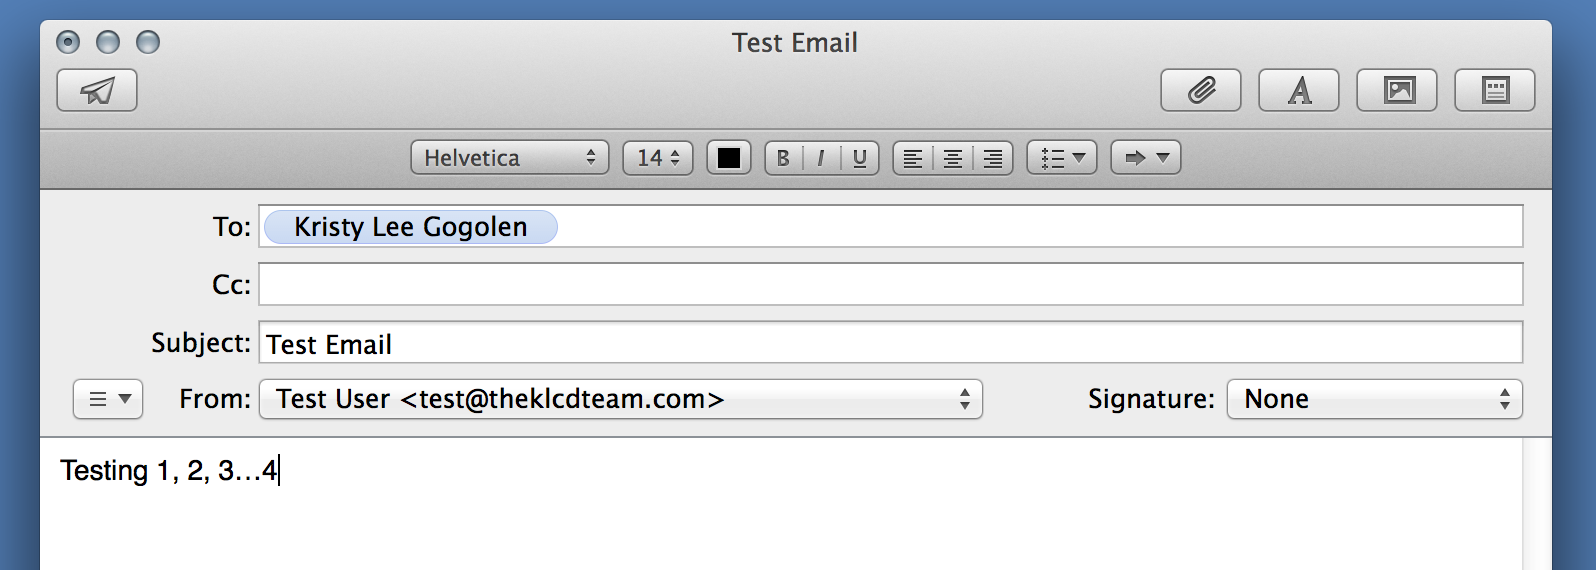
Step 5
Test your emails! Send yourself an email and don’t forget to send a reply message to yourself as well. If the test sending email fails, your outgoing mail server information are misconfigured. If you do not receive the email in return, your incoming settigns are misconfigured.
Editing your SMTP settings
If your test emails went through correctly, you do not need to follow this step. Frequently these settings are applied correctly. In case that the defaults did not apply correctly, here is how you edit the Outgoing Servers.
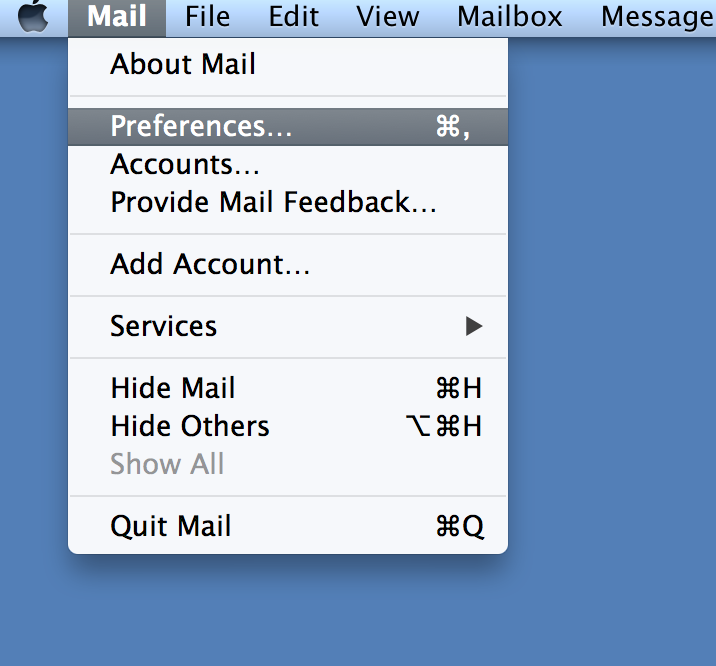
Step 1
Click on Mail -> Preferences on the toolbar, top left.
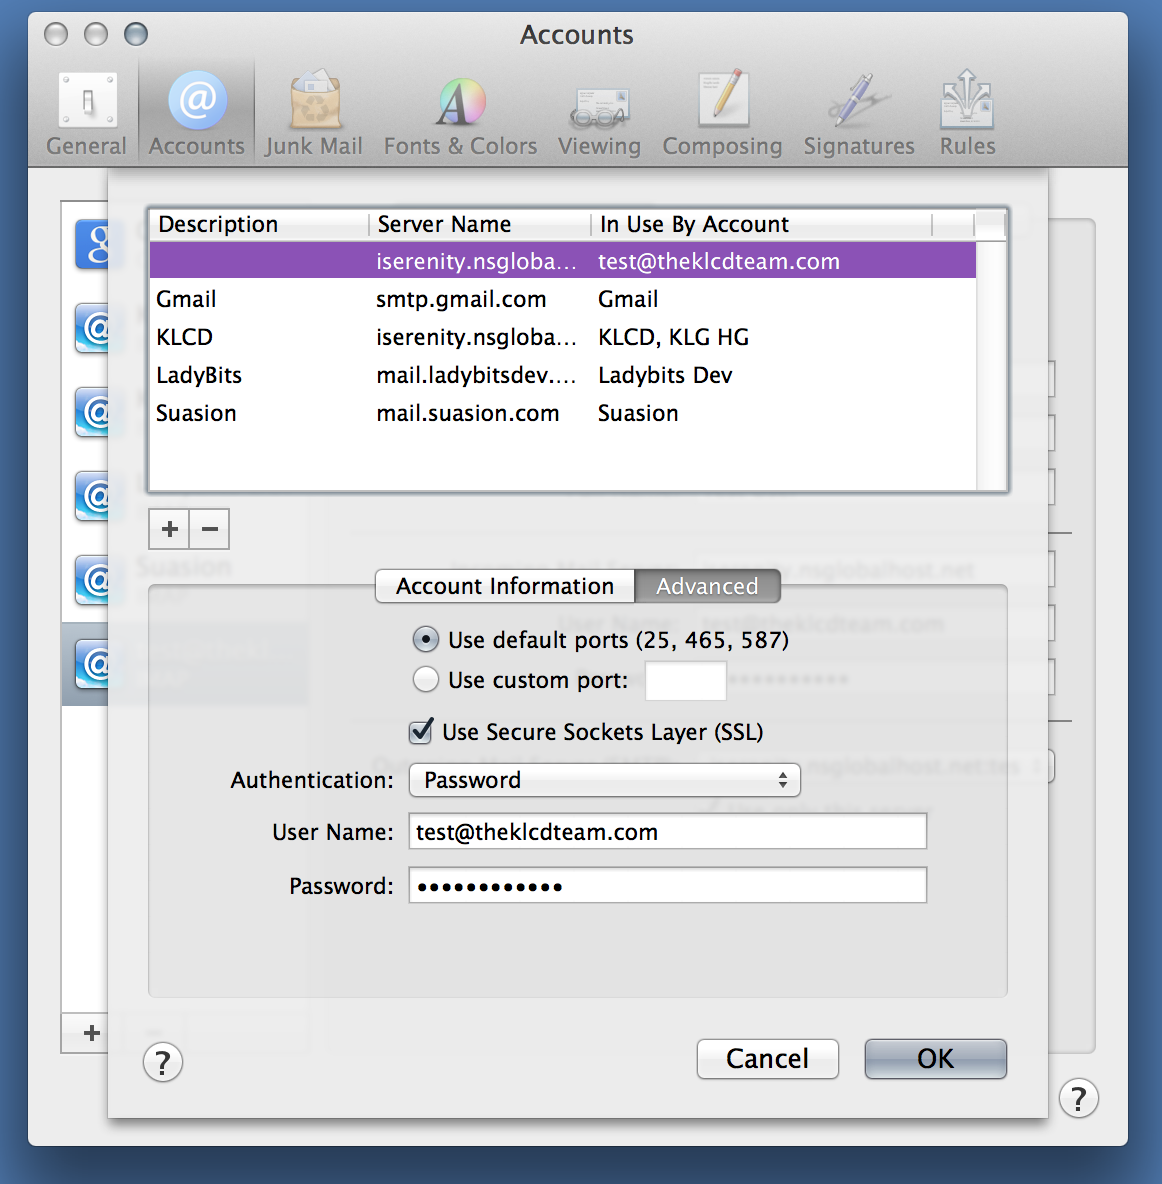
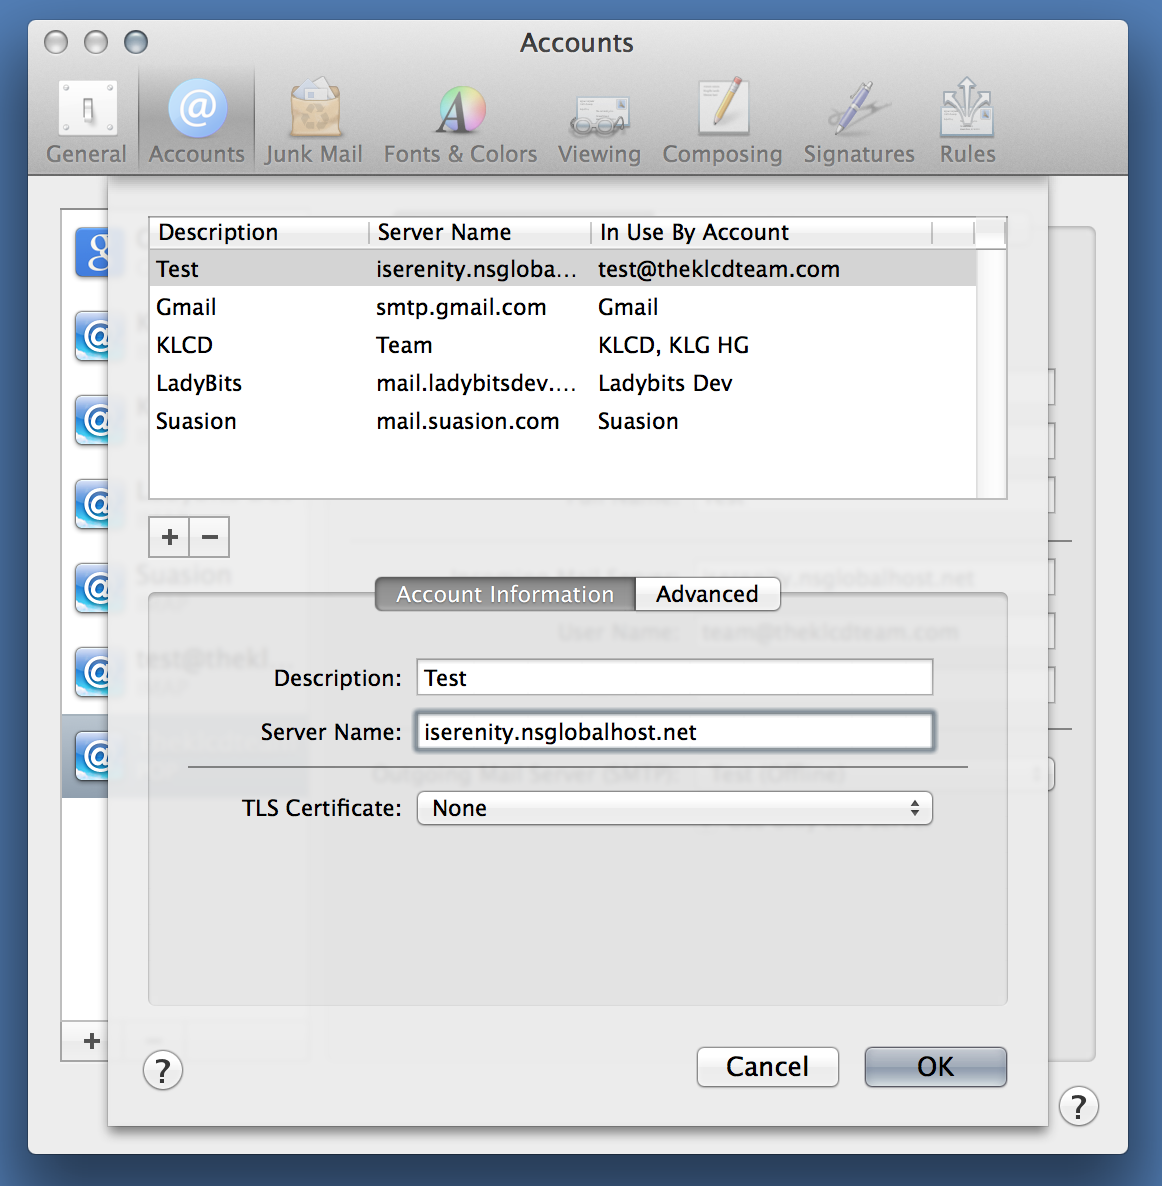
Step 2
Choose your account from the list. On the bottom right, click on “Outgoing Mail Server (SMTP) and scroll down to Edit SMTP Server List. This will allow you to choose and edit the Outgoing Mail Server for this account. From the list, confirm that the server with your info is highlighted. If Apple Mail settings this us using the defaults, it may not have a description so just look for “iserenity” in the Server Name column. Double check your settings against the below two images. Password Authentication is required.
Notes: Your email is always accessible via the web interface at http://yourdomain.com/webmail. (Change yourdomain.com for your domain). Here you can set up forwarders, change your password and access email from remote computers.


